This is pretty much copied and pasted from FT but I thought I'd make a post here as I'm hoping to start using the site a bit more frequently 
Well, I thought I'd finally start my project as my laptop is back up and working again.
I've taken pictures of every single step of what I'm doing but I'm not posting them all up. They are mainly so I dont forget where things go

but also I'm trying to make a picture archive of 90% of the parts that make up a fiesta.
The plan is to strip down my Mk 3.5 1.6 16v Si and re-build it, improving everything really, from the shell (seam welding), handling and braking (coilovers, discs all round), performance (2.0) to general styling. The aim is cover every aspect of the car, no neccesarily making it the fastest or most mental fiesta ever, but to have a good all rounder.
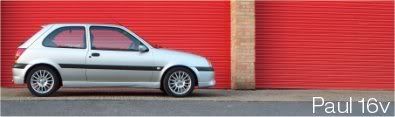
It started life looking like this:
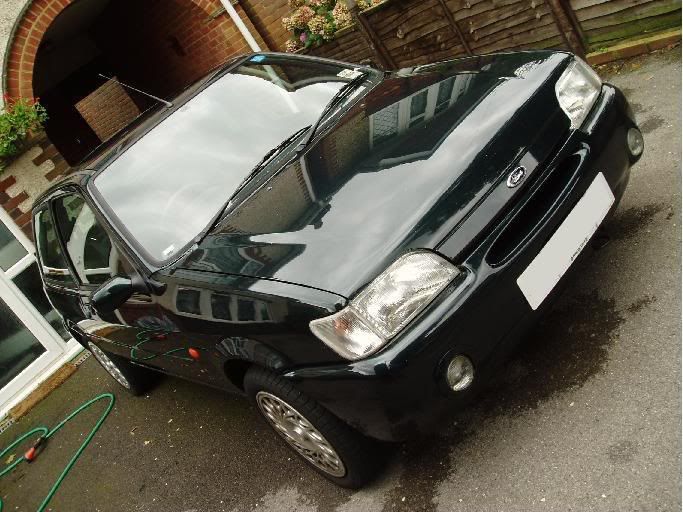
I'd colour coded the handles, made and fitted electric heated mirrors, waxoiled and soundproofed the car and done parts of the underside, among other things. Over the years I've collected most of the parts I need to carry out the 'main' work. Wheels, suspension, brakes, engine, seats etc I will post pictures of these when the time comes.
Some tools I've bought to complete the work:


Now the car is in a garage, I began stripping it down:


I have been stripping the engine bay down and it's at the stage now where all that is left is the bare engine.
Thats it for now, I will update things when there are substantial differences. Bare with me becuase this is all done in the spare few hours after work and weekends.
You can see where my front bumper is going:

This shows you what my 1st attempt at arch painting was like, and also shows my H&R's when they were grubby. The underside will be stripped to bare metal and all done again:

This is the engine I bought from 'Scort' the day I got it home, 2.0 16v:

The Z-S rear beam and focus rear disc brakes I bought from 'Ian FRST' off here also:

Cossie brakes I also bought off Ian:

Some touches I hope will make this car stand out, Volvo side repeaters, from the XC 70, thier smoked as you can see but they have a rubber gasket that 'frames' them nicely imo:

Seats I bought from 'Adam B' off this site not long ago:

Smoked rears, you can see how long ago I bought these by the magazine lol:

My H&R's stripped down ready to be re-painted:

Magnex exhaust with de-cat pipe (not shown)

All my chromed/polished bits:

I've smoothed off the jacking covers on my arches and skirts:

My BB bonnet, work in progress:


My smooth boot, again work in progress, I'm blending in an RS accessory spoiler too:


SMALL UPDATE, 29/05/06
Finally got my 2.0 on the stand! This was an accomplishment becuase I am pushed for space, so I desperately needed the engine on a stand so that I could move it around out of the way when needed.
I know this sound trivial, but it wasnt for me
First I had to order the stand and wait for it to arrive, then I needed to find out the best way to mount my engine to it.
I didnt really get much luck when I asked in technical, so I asked Scort who told me what size bolts I needed

and that head bolts do the job perfectly....unfortunately I dont have any head bolts lying around so I had to find some suitable ones.....easier said than done becuase nowhere seems to sell M10 bolts in the length needed.
THEN I had to take the clutch and flywheel off, without a flywheel locking tool. I got the clutch off fine by wedging a screwdriver in the teeth of the flywheel to hold it in place BUT the flywheel was a different matter. I ended up borrowing an air gun to get them off. Finally I had to take off the thermostat and coil pack and then, at long last, the engine was ready to be put on the stand!!

Now, as I mentioned before, I asked how to mount the engine to the stand in the Technical forum but I didnt get much luck, mainly replies such as 'head bolts do the trick' and if like me, you dont happen to have any of those spare, this is how I did it.
I got a length of M10 threaded bar and cut it into 4 200mm lengths. I also got a handfull of nuts and washers. Then I got some 'load spreading' or 'repair washers' (what ever you like to call them, big washers basically)
For the top 2 threaded holes in the block, I used 2 nuts on the threaded bar to lock together and tighten into the hole. As you can see from the pictures I used a load spreading washer, a normal washer and then a nut on the outer ends of the stand and just used a washer and nut on the engine side. Hope this helps anyone else in the same position I was.
Of course, if I go back tomorrow to find the engine smashed to pieces on the floor next to the stand, feel free to ignore my method.


Small Update 09/06/06
I had originally planned to take the engine and gearbox out together BUT after looking closely, that's gonna be too tight. So the new plan is to strip the engine down some more (to make it as small as possible), separate the engine from the box and take them out separately.
So here's the 1.6 stripped of most things nearly ready to be hoisted out, all I need to do is disconnect it from the gearbox and disconnect the fuel lines:

I also mocked up the 2.0 with all the parts from the 1.6. It's a 2.0 with the 1.6 mount, pas pump, alt, starter etc:

That is all lol
Hopefully I'll get the engine out over the weekend.
UPDATE 16/06/06
GOT THE ENGINE OUT!
:D:D:D
This is a BIG achievment for me becuase it's the first time i've done anything like this.
This is the engine pretty much as stripped as it's going to get before removal. I know a lot of people drop the engine out and lift the car over the top but I dont have room to do this, so i lifted it out (btw, I have to say, dropping it out and lifting the car over would have been easier lol)
Another thing I had to do before lifting the engine was to shorten the chains on the hoist. You can see how close it was at it's highest lift, so I didnt stand a chance when the chains were 200mm longer.

And it's out!

CHUFFED!
That's all for now really. When I took the engine out I had nowhere to put it but infront of the car, that's where it stayed for a few weeks while I waited for some more tools to arrive so i could break it down and get it out the way.