This is a guide I posted a few weeks back on
http://www.fiestaturbo.co.uk, and as most of you will probably want to put 2i/Turbo skirts and arches on your Si it might be of some help:

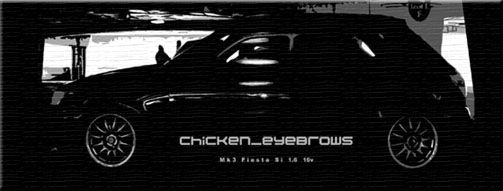
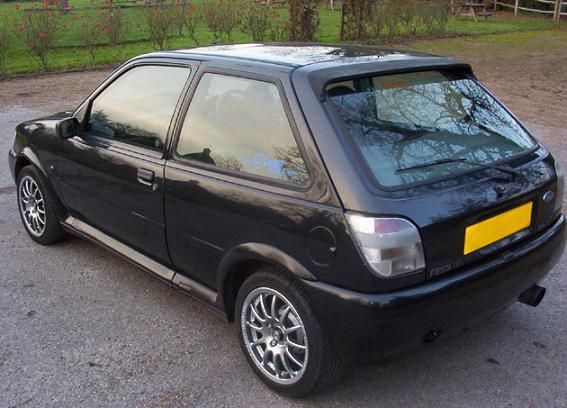
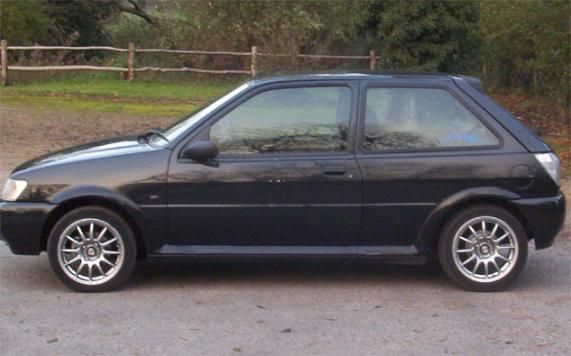
Having just finished painting my skirts and arches to put on my Fiesta Si I thought I might as well write a brief guide as to how I did it.
First off I bought a set of skirts and arches off of ebay. Be careful when you buy them to look closely at the pictures for scratches and damage - you can always look around for another set at the scrappies etc.
The ones I got were a mixture of black & white, the sorts of colours you got on the XR2is and RS Turbos but they needed a respray in Ash Black to match the Si.
First off you need to sand them down with some coarse paper, either Scotch Paper or Wet and Dry Paper from Halfords. They sell a project pack with a selection of grit sizes although you will probably not need the very coarse ones unless you plan to rub down metal bodywork in future. I used 200-400 grit Wet and Dry, used dry. Also pick up a pack of those disposable dust masks they sell and remember to wear them all the time, otherwise you'll kill your lungs
I rubbed off all the paint I could without damaging the plastic of the parts. Then I gave everything a clean with degreasant (I think you can use white spirit for this), and then a clean and rinse with water and washing up liquid. Then they were carefully wiped and left to dry.
The next step is spraying with the base coat, in the case of Ash Black I used Grey Primer (when you buy the rattle cans they tell you on the side what primer/laquer to use). Before you spray parts like this yourself you should seriously consider getting it done properly with a spray gun because while you may think this is a cheap way of doing it you are looking at at least ?60-70 worth of spray paint cans! I ended up using about 8-9 cans of the primer.
Hang the parts up in a clean and dust free shed or garage that is well ventilated but not draughty and is warm. A friend recommended using a space heater as well to improve the drying process. try to hang the parts in a horizontal position, use wires through holes in the parts to hang them.
To apply the spray, shake the can for a few minutes to mix the paint and remove the lid. Hold about 20cm back from the part, and starting a bit before the part spray from left to right evenly along the length of the part, applying a very thin misty coat. Repeat until you have mist-coated the whole thing and then leave it to dry for 15-20 minutes (while you do another part maybe). Don't be tempted to hold the can in one place for too long and get loads of primer on at once - you will end up with it running.
Repeat this spraying process lots of times, so you end up with several layers of primer. Leave it to dry for at least 24 hours. Next you need to sand down the primer surface to a smooth level with very fine paper (I used Wet and Dry 1200 grit, used wet). Be very careful here that you don't go to far with it and take off loads of primer. You are just aiming to get a smooth surface to apply the paint over. Clean and dry the parts afterwards as you did after removing the original paint.
Now repeat the spraying process above, only with the paint. You will need a lot more paint than primer, and to achieve the smoothest result it is a good idea to lightly run down the parts with 1200 grit paper (used wet) after every few layers of paint, but don't be too enthusiastic and end up rubbing it right down to the primer...
When you have an approximate match to the colour of your car it is time to spray on the lacquer. Remember if it is a pearlescent finish like Ash Black it will only match the car completely when the lacquer is on. Rub the parts down again with very fine paper and clean and dry them, then apply the lacquer as above. Laquer is pretty nasty sticky stuff so be careful where you're spraying it and (as with the primer and paint) don't let anything touch the parts as they dry. The amount of laquer you put on won't really affect the finish but you will need several layers at least to protect the paint underneath from road grime etc.
Let the lacquer dry for at least 24 hours and then you are ready to fit the skirts and arches. Either go buy a Haynes Mk3 Fiesta Manual which describes removal and refitting of the arches for the high end Fez models or follow the guides on the fiestaturbo forums.
Once the skirts and arches are on you can blend in the colour with the car bodywork by applying T-Cut to the panels to freshen up the paint.
I found that taking plenty of time and doing the job gradually gave the best results - it took me about 4 weeks, doing a couple of hours a couple of nights a week. I will try and post some pics once they are fitted onto the car.
Jamie